How to Make a Wine Cork Photo Stand | Northern Virginia Family Photographer

I have a bag of wine corks that has followed my husband and me through three living spaces and two moves. I had every intention of taking it to the nifty wine cork recycle bin at Whole Foods. My husband told me it would never happen and that we should just throw the corks away. Well, he was right. But I got the last word! At least about three of the corks, anyway. :-D

Bag of wine corks by Northern Virginia Family Photographer Nicole Sanchez

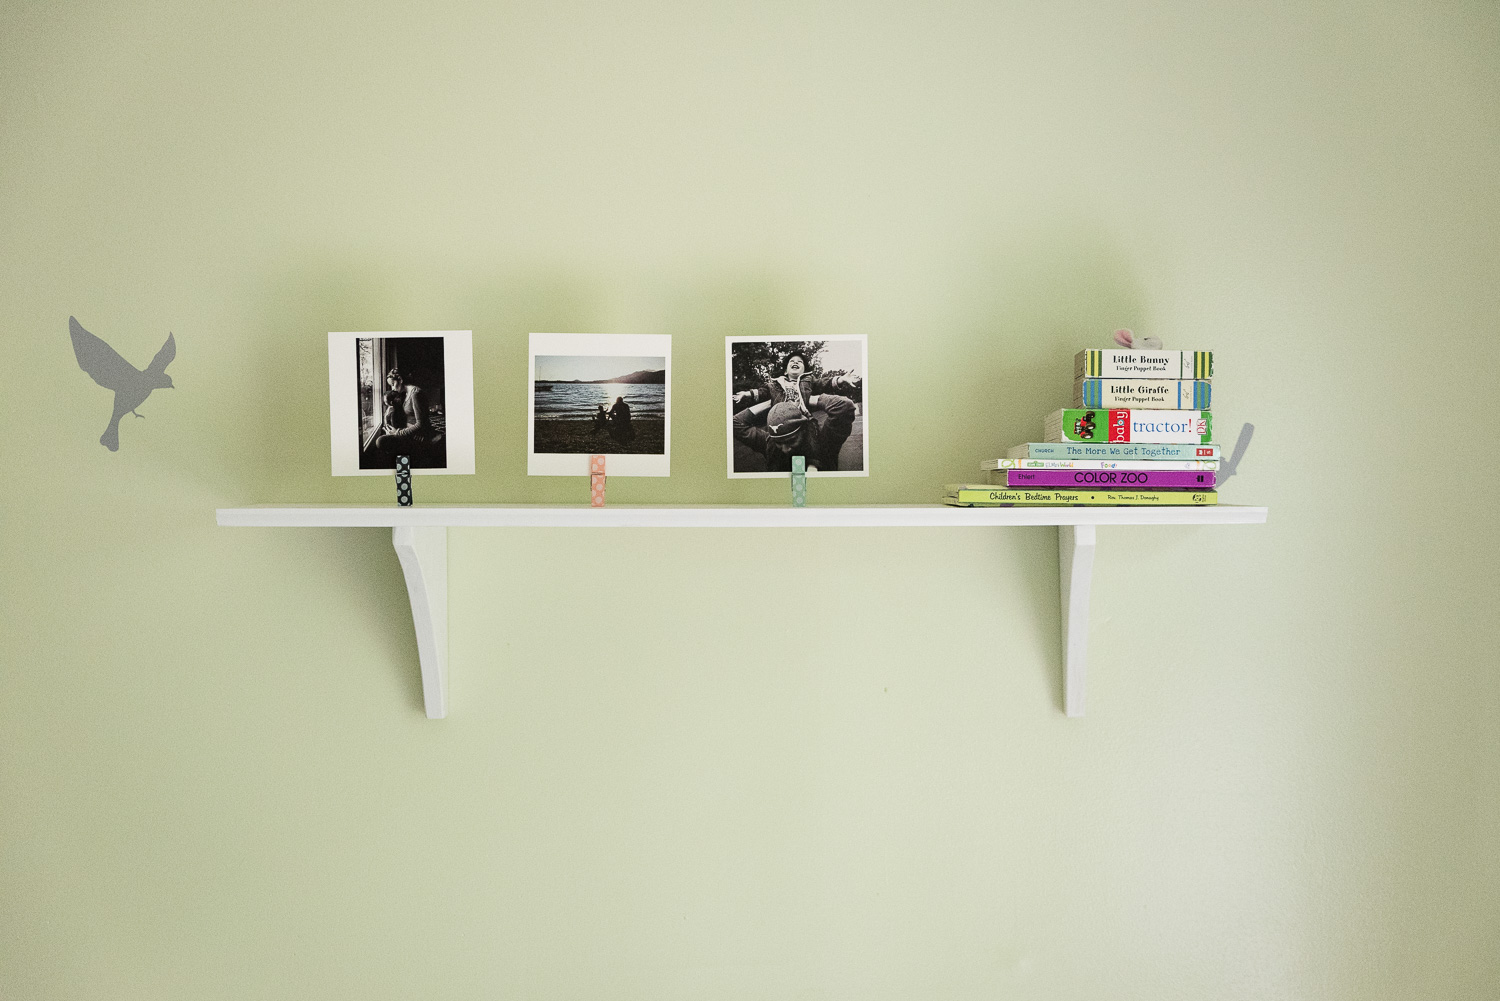
I'm always looking for fun ways to display my prints, especially my square prints, which don't lend themselves to framing. So when I came across wine cork displays for wedding seating arrangements on Pinterest, I thought they would be perfect for pictures. 

Here's how I did it:

What you need:

- wine corks

- small pot (steamer optional) and stove

- small hand saw (recommended) or serrated knife

- large binder clip (optional)

- photos

Using hand saw to cut cork by Northern Virginia Family Photographer Nicole Sanchez

What to do:

Cork on table by Northern Virginia Family Photographer Nicole Sanchez
Corks steaming for photo project by Alexandria, VA Family Photographer Nicole Sanchez
Using a hand saw to cut cork by Alexandria, VA Family Photographer Nicole Sanchez
  1. Steam your corks. This softens them up a little and prevents the cork from breaking into pieces when you cut it. 15-20 should do the trick. If you don't have a steamer, you can also boil them. This is especially good if you want to remove the any wine stains from the cork.
  2. If you have a binder clip large enough to slide over your cork, use it to help secure the cork while you're sawing. I didn't have one, but my fingers would have felt safer with one. 

    Next, use the hand saw to slice off enough cork to leave a flat bottom for a secure stand. You could also cut the cork in half to make two stands, if you like. While you could use a serrated knife, I recommend a hand saw if you have one. It takes a surprising amount of pressure and sawing to cut through the cork. Or maybe my blade was dull. Either way, just be mindful of your fingers!

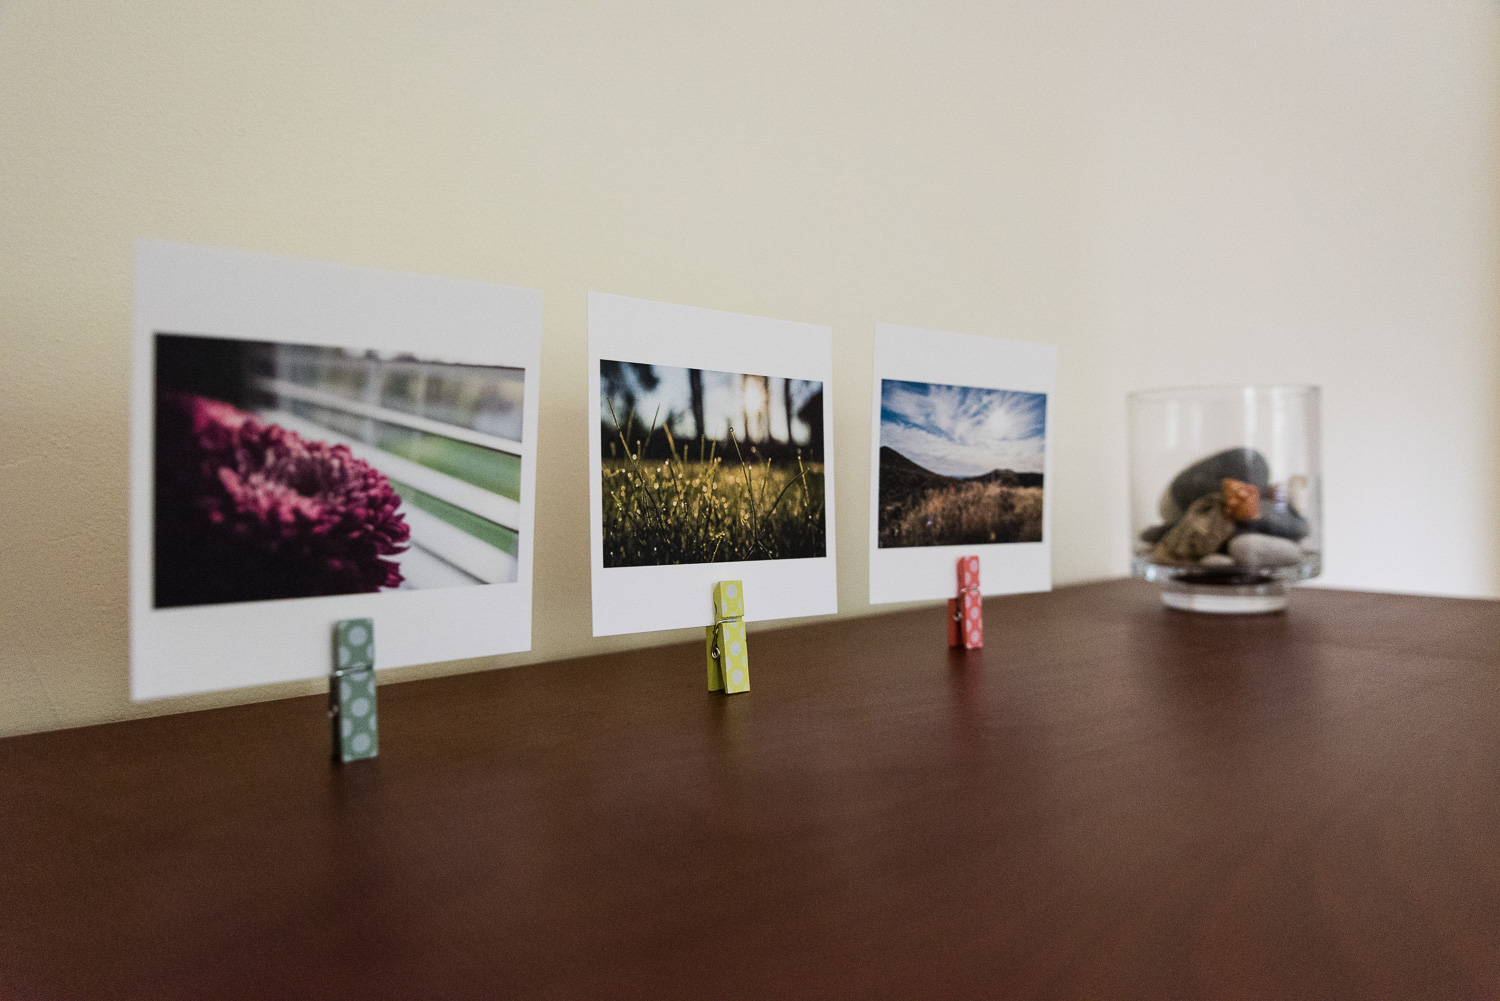
  3. Once you have the bottom of the stand shaved to your liking (it may take a bit of adjustment), use the saw to make a slit in the top of the cork. I made mind right in the middle. You may need to make the slit wider or deeper depending on your photos.

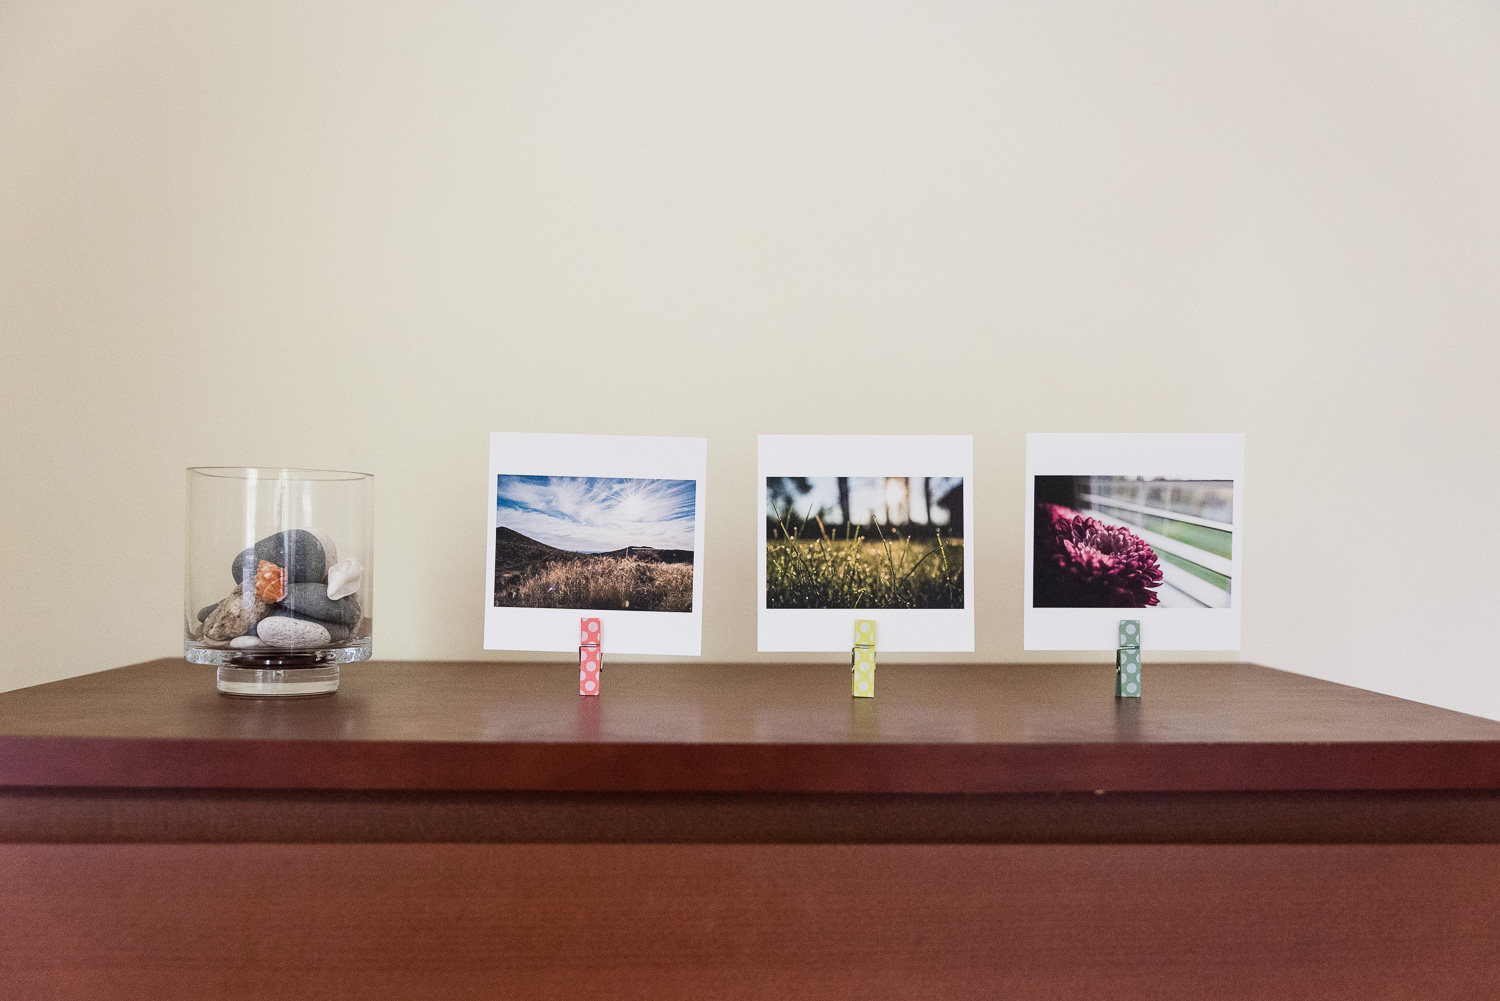
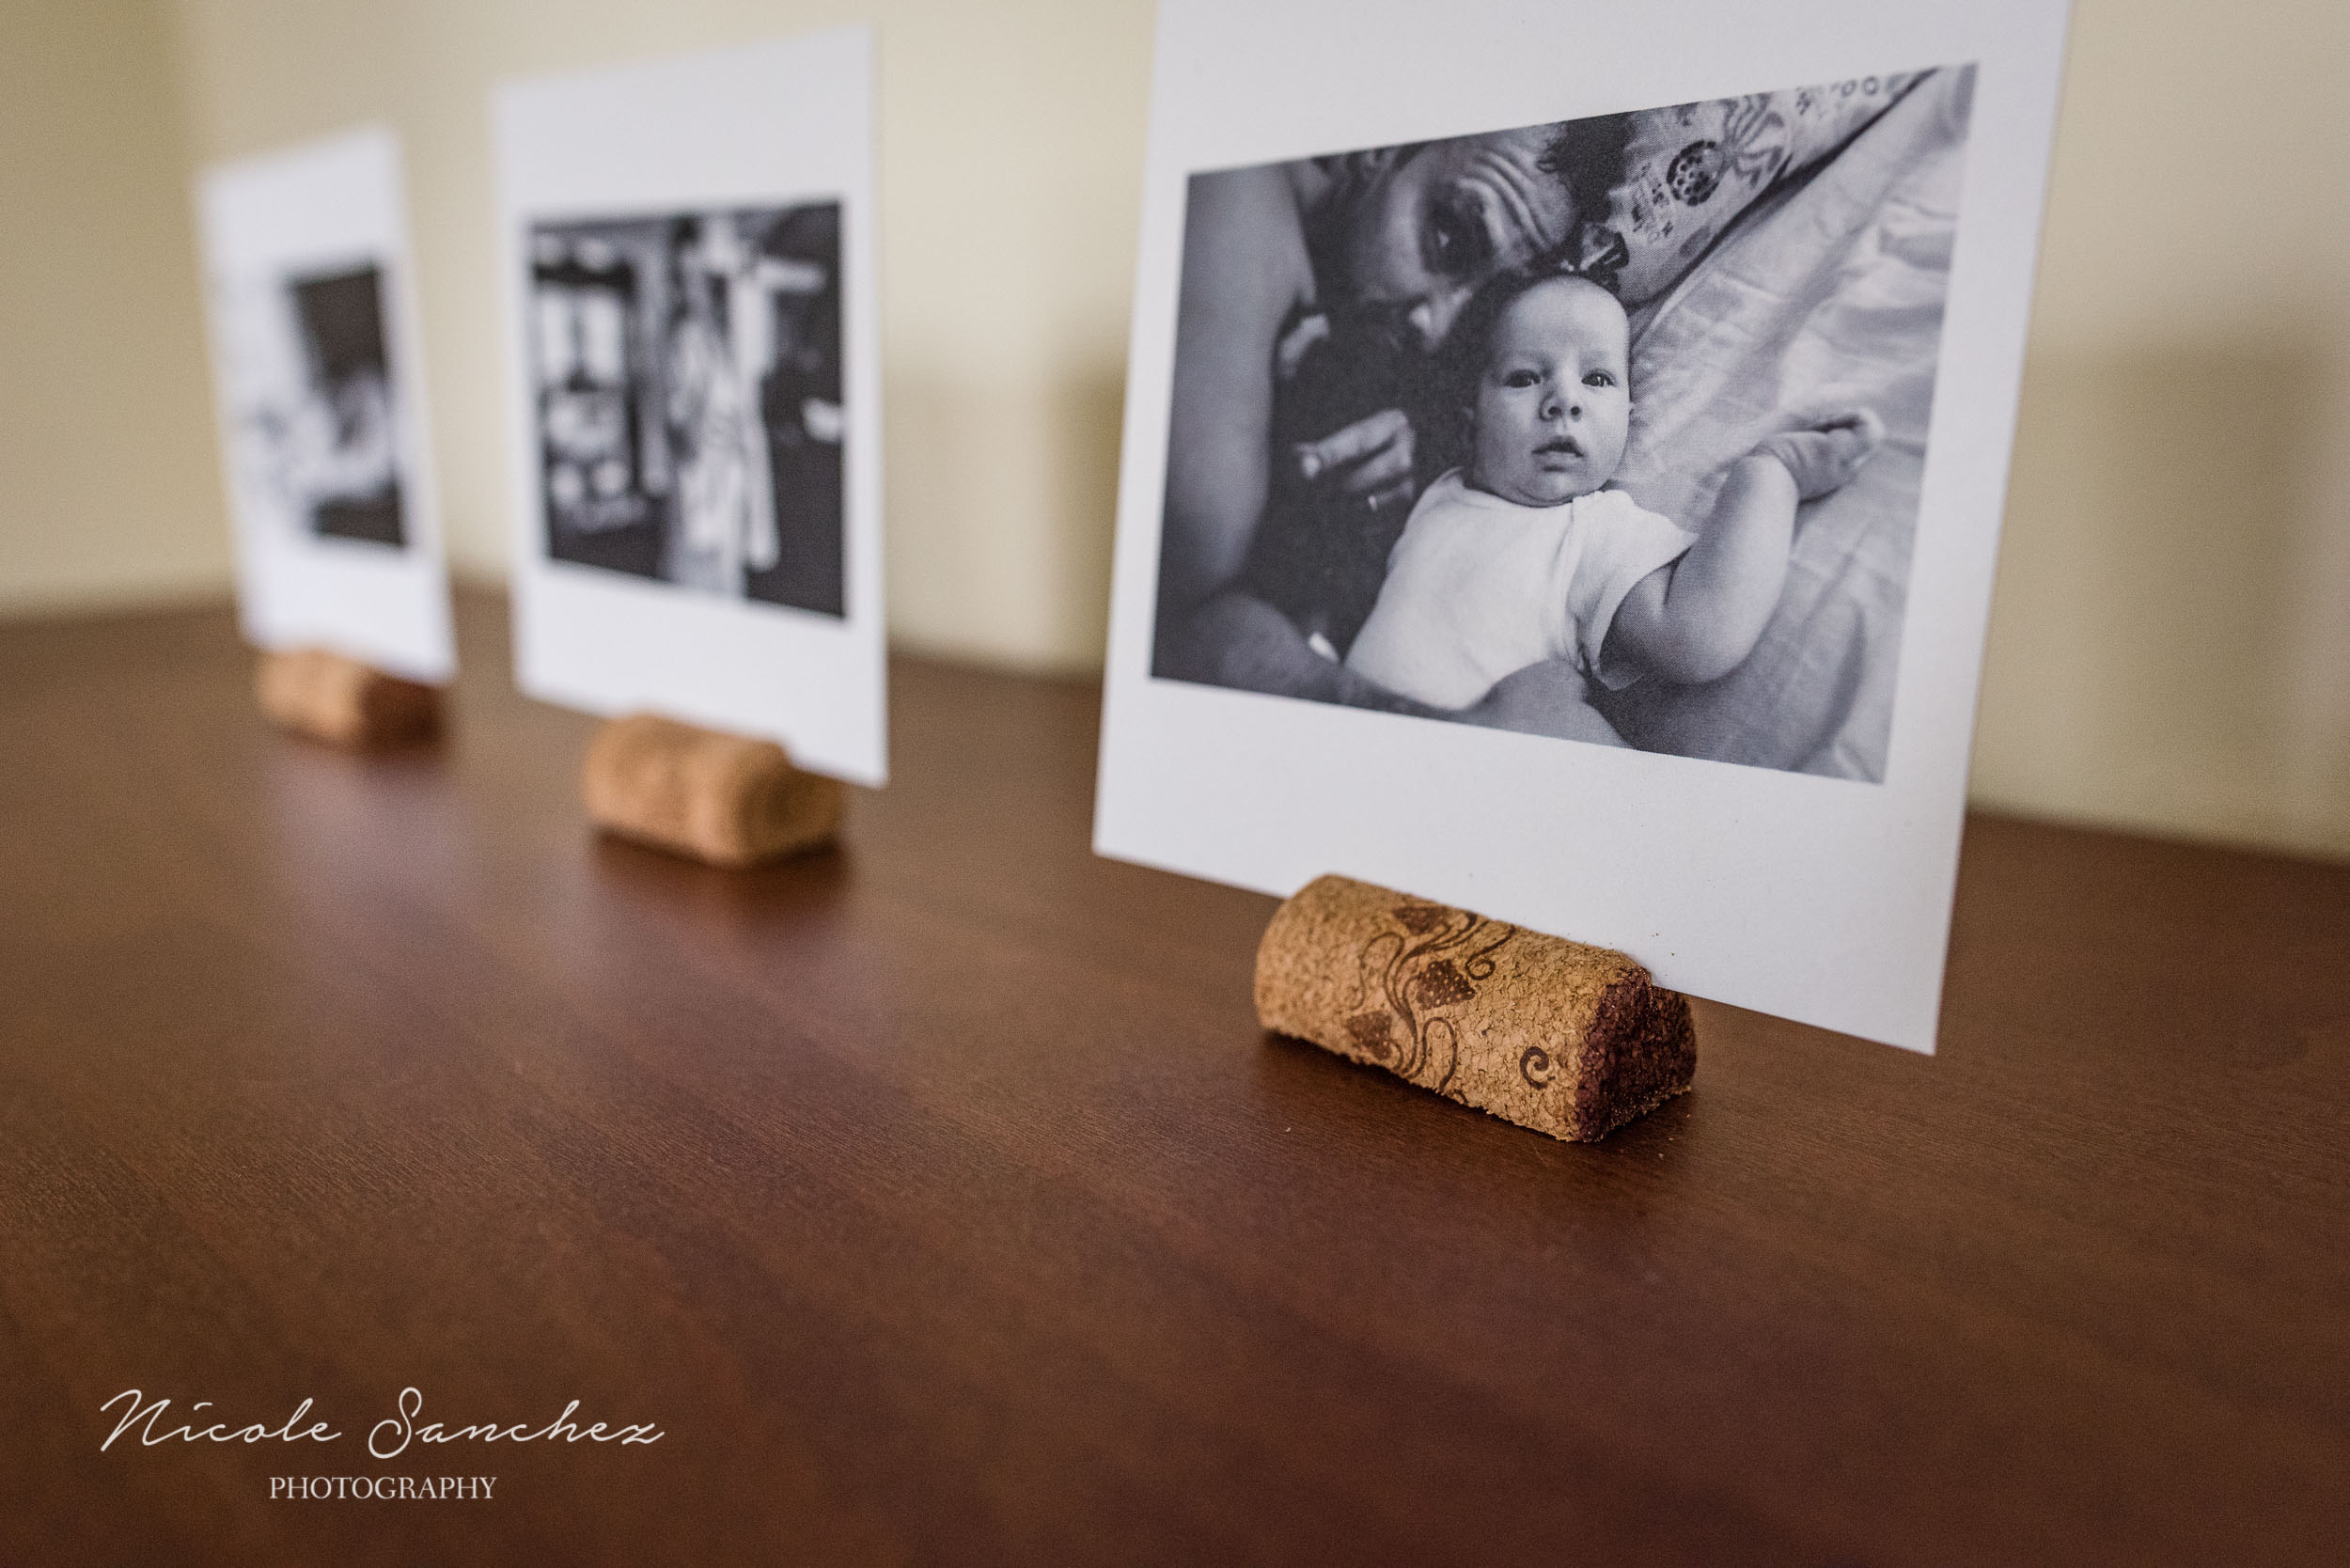
  4. Insert your photos and display proudly! Then figure out what crafty things to do with the rest of the corks in your bag. :-)

Close-up of cork photo stand by Northern Virginia Family Photographer Nicole Sanchez
Photos in cork photo stands by Alexandria, VA Family Photographer Nicole Sanchez

Do you have any fun photo display hacks? I'd love to hear about them in the comments (and maybe feature them here in another tutorial)!

Sign up for my newsletter below to receive tips on other fun ways to display your photos.

How to Make an Awesome Vacation Photo Display | Northern Virginia Family Photographer

I came across Melissa Stottman's vacation photo display tutorial while I was on vacation last summer and knew it would be the perfect way to showcase a little piece of our family reunion in Montana. I also knew the displays would make perfect Christmas gifts for our family and couldn't wait to make them. Except that I did wait...until almost the last minute.  After a bit of trial and error (I've never stained wood before) and a few extra trips to Lowe's and Michael's, I happily finished then this week and love the way they turned out. Now I just have to remember to ship them in time for Christmas! Here's everything you need to know to make an awesome vacation photo display.

Awesome Vacation Photo Display | Northern Virginia Lifesyle Photographer

Materials Needed:

  • wood plaques (these were $1.29 at Michael's) large enough to fit your print and any mementos you want to include
  • vacation memento. I used rocks to remember how much fun my son had throwing them in the lake. You could also use a vial of sand like Melissa shows in her tutorial. Or something else entirely!
  • photo of your choice
  • printout with location and date info, if desired
  • wood conditioner
  • wood stain in your color of choice
  • paint brushes
  • rubber gloves
  • old rags/cloths
  • sand paper
  • mod podge (I used satin finish)
  • hot glue gun
  • saw tooth picture hangers
  • mineral spirits (or paint thinner for cleanup)

After testing a couple of colors, I went with Minwax Ebony. I also learned after testing that unfinished wood can be soft and porous which can lead to blotchy staining, so pretreating with a wood conditioner is a good idea. 

1. First sand any rough edges of the wood and wipe away any dust. Put on your rubber gloves to protect your hands and make sure you're in a well-ventilated area or outside (I wouldn't do the staining process inside because of the fumes.)

Unfinished wood plaque with can of stain and paintbrush | Alexandria VA family photographer

Use a paint brush to apply wood conditioner to the plaque. Allow to rest for 5-10 minutes, then wipe off any excess with a clean, dry cloth. 

2. Next, the staining. But first a note: It's useful to do a bit of testing on an extra piece of wood to determine how long to leave the stain on and how many coats you need to apply to get your desired color.  It lengthens the process, especially if you wait for the test piece to dry, but it's worth it to ensure your end result had the color you want. 

Within 5-10 minutes of applying wood conditioner, apply a coat of stain with paint brush. I used one coat of Minwax Ebony and let rest for about 10 minutes.  Wipe away excess with cloth and let dry. (I let rest until the next day.)  Use the mineral spirits to clean your brush.

4. Once dry, you're ready to assemble everything else.  It's helpful to arrange everything on the plaque before you start gluing to make sure everything fits.  When you're ready, apply a thin layer of mod podge to the photo and place on plaque. Allow to dry.

materials in place for making photo display | Northern Virginia documentary family photographer

If you want to include a bit of info about your vacation, add that next. I printed the location and date of our trip, cut to size, and secured with a very thin layer of mod podge mod podge to prevent bubbling. I printed mine on regular letter paper (I tested three font sizes and 14 worked best for me), but you might try something thicker if you have it to prevent it from bubbling up when you glue it.

acation info disply | Alexandria Virginia family photographer

5. Before starting this next step, it can be helpful to ensure you have a clean workspace, free from any dust or pet hair (ahem, cat-who- insisted-on-assisting-me).  Once you start applying the mod podge, it's difficult to remove any dirt or stray hairs without smudges.

Apply thin layer of mod podge over entire plaque, including print. Be careful to go very thinly over printer paper. Mod podge dries very quickly, so when going over the photo, I found it helpful to be pretty liberal with the application and move quickly. If you start with the photo you can push any excess to the edges and use on the rest of the plaque. It will look cloudy at first, but will turn clear as it dries, which takes less than half an hour. 

od podge drying on wood photo  display | northern virginia family photographer

6. Next, use a hot glue gun to secure your memento(s).

7. Finally, secure a saw tooth hanger to the back of the plaque and hang proudly! 

ttaching sawtooth picture hanger | northern va lifestyle family photographer
inished vacation photo display hanging on wall | alexandria virginia lifesyle family photographer

inished vacation photo display hanging on wall | alexandria virginia lifesyle family photographer

Aside from the staining process which took a bit longer due to testing (and that I've never stained wood before) this was a really quick process and super easy.  Check out Melissa's tutorial to learn how to make a display using paint and a sand vial. And please come back to share if you make one yourself.

Sign up below for my email list to receive more ideas for how to display your photos and tips for documenting your family.
 

Five Tips for Documenting Your Newborn | Northern Virginia Family Photographer

I've always been interested in photography, but I finally decided to learn how to use my camera when I wanted to take pretty photos of my first-born son. After he was born, I found myself wishing I had hired a photographer to capture all those cute newborn details and squishy newborn poses. I tried (and failed!) to get the Pinterest-worthy baby pictures (although I have a ton of baby pictures I wouldn't trade for the world). 

I've had a lot of practice since then, and while I did hire a photographer to document our birth and time at the hospital this time around, I couldn't hire a photographer to live with us for the first month, so during my pregnancy, I made note of the ways I could document the newborn phase myself.  

Here are a few tips based on my experience:

1. Details - My photography interests and style have changed from traditional posed portraits to candid, documentary and lifestyle images, but capturing details is still a must.  Who doesn't swoon over baby toes? :-) But details go beyond baby toes and fingers. It's important to give attention to moments when you feel that little pang of sentimentality - when you know you're seeing something you will want to remember. Something that will be brief and forgotten if you don't capture it. Which brings me to my next tip.  

Documenting Newborn Details | Northern Virginia Family Photographer

2.  Pay Attention to Moments - While the images above are indeed of details, the idea of paying attention to detail is important across all the images in this post. Determining which moments are important to you and making note (literally sometimes, in my case - hello, Evernote) if you aren't able to photograph a moment right away, is key to documenting this time in a meaningful way.  I'll talk more about planning for images in a follow-up post on getting in the picture with your baby.

3. Go with the baby flow - Figuring out your baby is one of the earliest tasks of parenting and it isn't suspended while you're trying to get through your own personal photo shoot.  If your baby (or you!) just isn't feeling it, try again later.  It's helpful to make note of good areas of light in your house and when to find the best light in each area.  That way when you and baby are ready, you know where to go.

4. Happy and not - Not every moment is an easy one.  It wouldn't be parenthood without some stressful moments.  Own it.  Someday you'll look back on those moments and feel strength for having come through them.  It's part of the beauty of motherhood, so try to capture that in your images.

Crying, unhappy baby | Northern Virginia Family Photographer

5. Remember family (but don't stress about it) - We were lucky to have many grandparents come to meet our new son and I knew I wanted to capture those special moments of them with our son. Especially in those early days, it was hard to balance caring for a new baby, engaging with family, and photographing it all at the same time.  So I made peace with the realization that I could not capture everything.  It's more important to just be present and take some down time to rest while others are there to help.  So put the camera down sometimes (or hand it over to someone else!) and don't feel bad about not capturing every moment.  

Newborn with Grandparents | Northern Virginia Documentary Photographer

Another note on the family front, I found it so hard to document moments of my 3 year old and newborn together. For one, 3 year olds move fast.  And while newborns do not move so fast, when you're behind the camera your reflexes aren't so great. So it was hard to think about all the usual composition aspects and camera settings while simultaneously protecting my newborn from his big brother's love. I didn't get many of these, but that's one benefit to the newborn phase - they grow quickly and become less fragile. :-)

Newborn with brother | Northern Virginia Lifestyle Photographer

Finally, I can't leave off without saying it: get in the frame. I'll share more tips in a later post about how to get in the picture with your baby, but for now, here's one of my favorites from the early days. 

Self-portrait with baby | Northern Virginia Lifestyle Photographer

Sign up for my newsletter to receive more tips on documenting your family.

Print Your Photos - Gallery Wall | Northern Virginia Family Photographer

I've had grand visions for several years of beautiful gallery walls of pictures throughout my house. Pinterest-worthy galleries with various vintagey frames found in random mom-and-pop stores. Frames that, when asked, I could say, "Oh that one? I found it at the cutest little thrift store for $5." In my grandest of visions, these thrift store finds were made in some quaint beach town while on vacation...

In reality? I'm lazy. Gallery walls take time and lots of effort to look effortlessly put together. And while I adore beach vacations, vintage frame shopping with little ones is not something I've mastered. Heck, I'm still working on getting grocery shopping down. So when I came across gallery walls in-a-box, I thought, "Woohoo! A lazy lady's answer to home decor!"

While not quite effortless, for the price and time spent, these gallery in a box sets are perfect for our family. Here's how I put together our latest wall. Nevermind that it took me a year to get these pictures printed...

I'll note that I took each of these behind-the-scenes pictures on a different day, so this was not a done-in-one-afternoon job.  The gallery wall kit takes some of the guess-work out of how to place frames, but it's not foolproof.  I always end up cutting up the suggested templates to make my own to better fit the pictures I choose to print.  And in the ones I've purchased, the hardware for hanging the frame doesn't allow you to adjust them for leveling once you've placed the screw/nail (although they thankfully seem to have changed this in their latest frame sets).

So, it's still not as easy as I'd wish it to be, but it's easy enough that I'll actually get it done.  And I love walking by these pictures in my hallway every day.  

I still have two sets left to hang before maternity leave is up.  I remain optimistic, but I count getting this one up as a big win. :-)  How do you display your prints?  Any framing tips?

Sign up below for my mailing list to receive other tips for displaying your pictures (and lots of encouragement and reminders to print them!).

Tips for Maternity Self-Portraits | Northern Virginia Family Photographer

I don't necessarily mind having my picture taken, although I'm not exactly comfortable in front of the camera. (I wouldn't have room to list all the ways I looked goofy in my school portraits growing up.) But when it comes to my family, and especially my kids, I want to exist in our photos, even when I'm not wearing makeup (and perhaps still in my pajamas.)   

Self portraits were not on my list of things to learn when I started my photography journey.  I wanted nice pictures of my son and that naturally included my husband. But as I learned more and got to know other women photographers, I saw the beauty of self portraiture and especially that of women with their children.  I didn't take many bump photos when I was pregnant with my first son, so I resolved to do better when we got pregnant again.  

If you've never tried self-portraits (beyond the selfie feature on your phone), getting in the picture with your kid(s) is a great place to start.  Being with someone else takes away some of the awkwardness and you're naturally most relaxed (and looking your best) when you're with your family.  Once you've done a few self-portraits with your kids, you may find it easier to take some by yourself.

Here are a few tips I learned after nine months of maternity self-portraits (and some of my favorite images). And for a primer on self-portraits, check out these earlier posts on reasons to get in the picture with your kids and tips for getting in front of the camera with your family. 

1. Find the light.  Inspiration, for me, is the one of the hardest parts of taking self-portraits. Coming up with unique ideas can be difficult.  I found that starting with the light can be the easiest way to get inspired.  Find a place with pretty light and go from there.  This could be the morning sun coming in through the bedroom window. Or softer, mid-afternoon light, perhaps in the very same window.  You can change up the perspective to make the images unique.  

Maternity Self-Portrait | Afternoon Window Light | Northern Virginia Family Photographer

Or, it may not even be natural light at all.  You can get creative with artificial light as well.  It helps to have your camera and tripod ready to go any time inspiration strikes.  There were many times I wasn't even planning to take a shot, when I saw the light and just went for it.

Maternity Self Portrait with Ice Cream by Artificial Refrigerator Light

Start observing the light in your house throughout the day.  Notice where you see it and how it changes, which brings me to my second tip...  

2. Keep a notebook.  You may not always have the time to stop what you're doing and take a picture, so keep a notebook (I also love using the Evernote app on my phone) and write down ideas as they come to you.  It's especially helpful to note the time of day you see especially nice light. It can change quickly during the day (and with the season too).  Pay attention to others' images you see as well, whether you follow any photographers on social media  (Alice Che is wonderful at self-portraiture) or you're thumbing through a magazine.  Inspiration doesn't have to come from strictly maternity shots, or even self-portraits.  Just look for images that you find appealing and try to make them your own.

Maternity Portrait Inspiration | Northern Virginia Family Photographer

3. Be flexible.  You may have an idea for the perfect shot in your mind, but it's just not happening.  Maybe your cat keeps getting in the frame.  Or your child just isn't interested.  Go with the flow.  With my son, I often started with whatever activity he was interested in doing at the time and asked him to do it in a place with good light.  Whether it was reading on the bed or on the couch, or playing Legos on the floor, he was much more interested in (and sometimes not even aware of) taking pictures when we were doing an activity that he was interested in.

4. Keep trying. Not every idea for a shot works out. Sometimes it's a matter of adjusting (waiting for better light or changing the perspective). And sometimes it may not work no matter what you try. I took a lot of shots that I didn't include in this post.  While they may not be share-worthy, they're still keepers and were worth the effort. Because I know my kids will appreciate them despite any flaws I see.

Now that I've had my second son, I'm having fun getting in the picture with him too. I'll be sharing more self-portrait tips in a few weeks, so come back to visit or join my mailing list to receive tips on documenting your family life straight to your inbox.. 

Before & After: A Motherhood Self-Portrait | Northern Virginia Family Photographer

Life has been full lately, in a good way. Over the coming weeks, I have some tutorials to share on what I've learned about taking motherhood self-portraits, as well as some fun new client sessions to share. But for this week, I'll keep it short and sweet, so I can go spend some more time with this little guy. ;-)  

I thought it would be fun to post a "before & after" edit. When I began pursuing photography in earnest, I was surprised to learn how much of a difference post-processing an image can make.  Learning to get an image right in-camera is the first step to making a great picture. Developing a style of editing that speaks to you and reflects the story as you see it is the rest of the fun (and work).

Motherhood Self Portrait | Northern Virginia Documentary Family Photographer

I generally love color in the images I take in this room.  (It's one of the few rooms in my house where I like the paint we chose for the walls. ;-) ) But for some images, like this one, I choose to convert to black and white.  In this case, I prefer black and white because I want my son's face to be the emphasis.  Converting an image to black and white is one way to eliminate distractions that aren't important to the subject.  In color, I feel the walls and my hair draw the attention away from his face. But in black and white, the eye is drawn right to the light highlighting his face and arms. 

Motherhood Self Portrait | Northern Virginia Family Photographer

The rest of the edits involve a bit of experimenting.  Aside from converting to black and white, I've straightened the lines, increased the contrast, bumped up the clarity, and brought down the shadows for more depth.  The majority of my indoor images are shot in low light, so I generally increase the luminance a bit to reduce noise/grain. I edit almost exclusively in Lightroom and use Photoshop occasionally when needed.  

Check back in the coming weeks to learn more about getting in the picture and taking self-portraits with your children.  And sign up for my email list to receive tips about documenting your family!   

Print Your Photos - Part I Follow-up | Northern Virginia Family Photographer

Life has been a bit busy around here lately with normal summer fun and planning for Baby #2's imminent arrival.  I'm not usually much of an interior decorator (or housekeeper, for that matter), so I've been enjoying the nesting phase and making some plans for maternity leave projects. One project is to get more pictures printed to display in our house.  So I look forward to sharing some of those tips in the coming months.

Today I wanted to follow up from my first post on printing your photos with another example using Artifact Uprising's square prints.  I loved the idea of using fun clips as holders, but I was having a hard time figuring out where to put them.  Between an adventurous toddler and two curious cats, there aren't many places that are free from curious paws.  We'll see if I've found success, but in the meantime, I'll enjoy a couple more areas that now have a more personal touch.

Print your photos | Northern Virginia Family Photographer

I can't believe I haven't put family prints in the nursery yet.  Even though we don't spend a lot of time there, the room seemed a little generic without any real family reminders, so having these prints, especially of my son and us make the room much more homey.  And I love that I can switch them out whenever I feel the urge.

I also decided to add a few non-family images to the guest room.  Since these are on the dresser, I imagine they're most likely to be knocked down (and possibly cause annoyance to our guests as they're a bit of a pain to stand up and keep aligned :-/ ).  So I'll be on the lookout around the house for more out-of-the-way areas...

Just as I mentioned last time, Artifact Uprising isn't sponsoring this post in any way, I just love the convenience of their prints and that I can get them practically free with their occasional codes.  I promise to share the code on my Facebook page next time I come across one, so give my page a like if you want to be in on it too! 

And if you'd like to stay in touch with other printing and photography tips, sign up for my newsletter below! 

Happy printing!